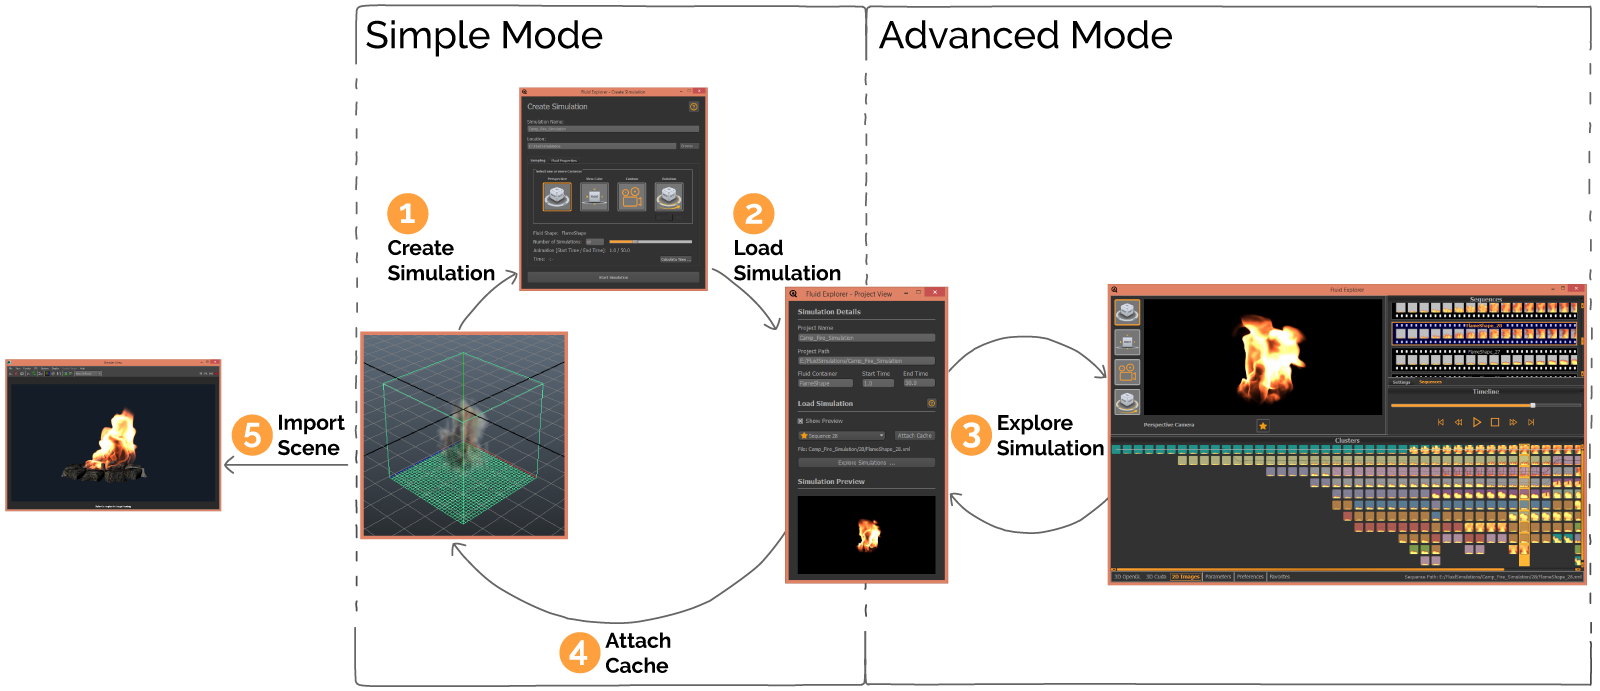
The following section shows how the Fluid Explorer plugin can be applied for visual effects design. Based on the workflow illustrated in Figure 1, this tutorial explains how the plugin can be used for creating, loading and exploring a simulation. The plugin supports two modes - a beginner's mode and an advanced mode. Please note that the usage of the advanced mode is optional. The following sections discuss the individual steps in more details.
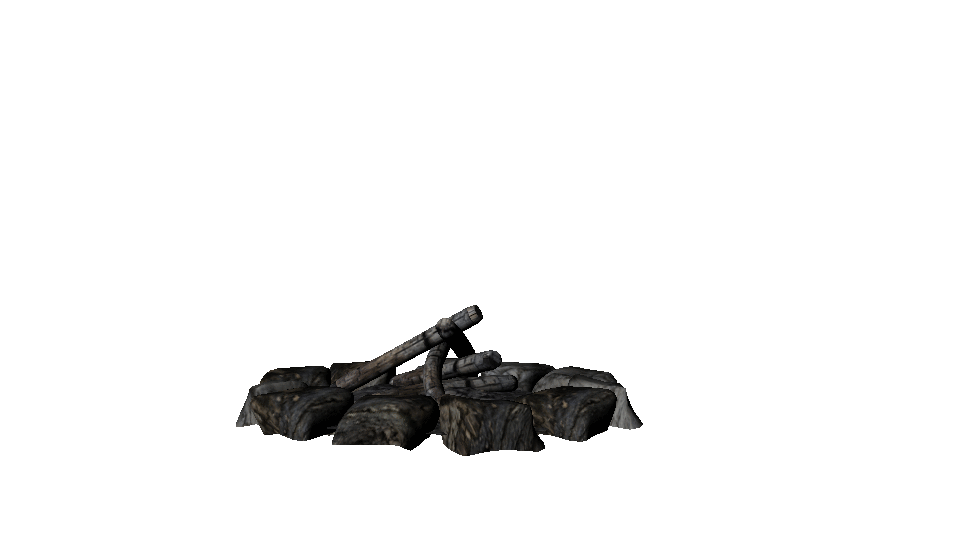
The goal of this tutorial is to create a basic fire effect for the fire place scene depicted in Figure 2. Please make sure you already have installed the plugin as discussed in the installation section. This tutorial is based on Maya version 2014.
You can download the Maya scene files (fire place scene and the fluid effect scene) which are discussed in the following sections here: Download scene files.
The entire simulation project (all rendered animations and cached fluid files) can be downloaded here: Download simulation project (~1.4 GB).
In this tutorial we work with three seperate Maya scenes:
 Create Simulation
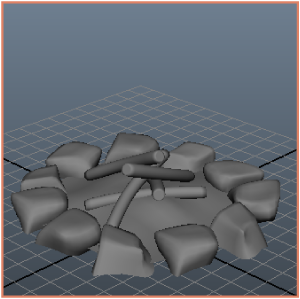
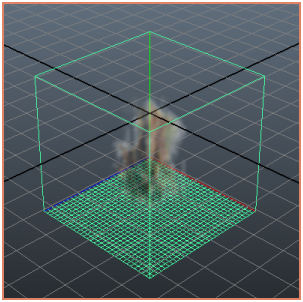
Firstly, we create a new simulation which contains multiple fire sequenes. Therefore, please open a new Maya scene file and create the 3D fluid container that contains the fluid effect by choosing Fluid Effects > Create 3D Container with Emitter. Alternatively, you can load an existing fluid example from the Visor Editor. Figure 3 shows an example for a 3D fluid container, representing a basic fire scene. Please note that the plugin supports different fluid container types - 2D and 3D fluid containers.
After you have specified the basic properties of the fluid effect (e.g. start time, end time, content details), open the Fluid Explorer plugin and create a new simulation. The create simulation dialog (see Figure 4) allows you to generate multiple sequences based on the underlying fluid container by applying a parameter sampling technique. Please visit the help section for more details on how to create a new simulation.
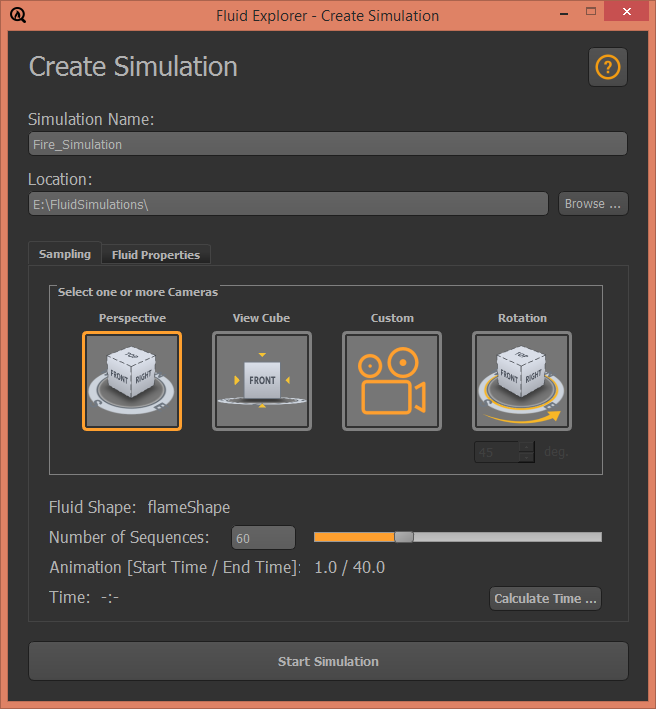
The plugin creates a project directory for the entire simulation. In this directory you find the Maya file (fluid_simulation_scene.mb) which contains the 3D fluid container as well as a project settings file (<ProjectName.fxp>) which stores meta-information about the simulation. Furthermore, this directory contains cached fluid nodes and rendered images of all generated fluid effect sequences.
 Load Simulation
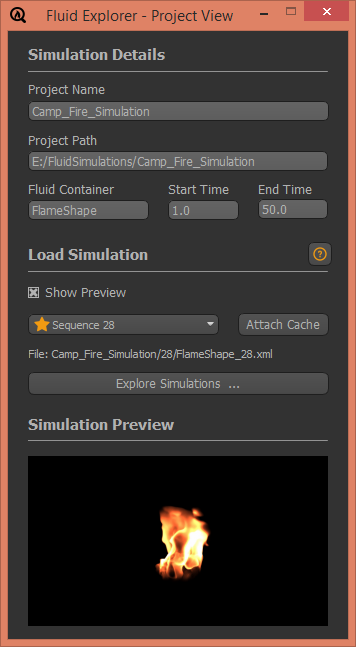
In order to load a simulation, please navigate to the corresponding simulation directory and open the Maya scene file (fluid_simulation_scene.mb) which holds the 3D fluid container. After you have opened the scene file, call the Fluid Explorer plugin and load the project file of the simulation (<ProjectName.fxp>). The project file is located in the root directory of the simulation project. After you have loaded the project file, the dialog illustrated in Figure 5 appears. This dialog allows you to either load cached fluid objects (which were created during the creation of the project), or explore the simulation with the interactive visualization application (advanced mode).
 Explore Simulation (Advanced Mode)
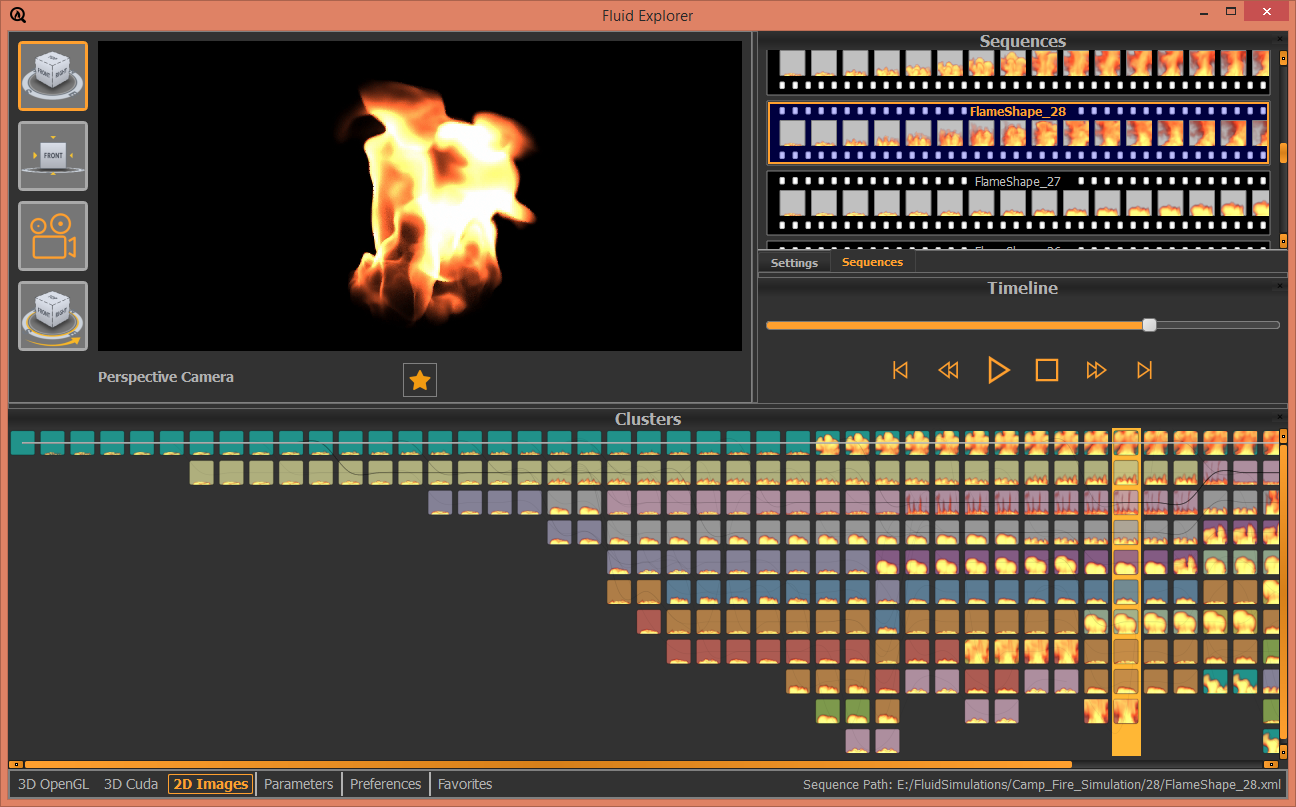
The advanced mode enables a result-driven exploration of the previously created simulation. The goal is to find desired animation sequences using an interactive search-by-example approach.
The bookmarking feature ( ) can be used in order to tag sequences which match the visually desired effect characteristics. Please visit the help section to learn more about the interactive exploration application.
 Attach Cache
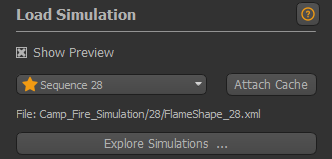
In a last step, you need to load the cached fluid files from the simulation directory. These cached files store the fluid properties of the sequences which have been created during the simulation stage. In order to load a fluid cache from the file system please select the desired sequence from the drop-down menu and press the Apply Cache button (see Figure 7). Alternatively, it’s also possible to manually load the cached fluid files (please visit the Maya user guide for more details).
Please insure that you haven’t changed the name of the 3D fluid container, because the original name of the container is used in the settings file.
After you found the desired sequence and applied the corresponding cache file to it, you should export the 3D fluid container with its properties in a separate file. Therefore, choose File > Save Scene as and store the file on your file system (e.g. fire_effect_export_1.mb).
Please do not override the original Maya file of the simulation project (fluid_simulation_scene.mb), because the Fluid Explorer plugin loads the simulation from exactly this file. Furthermore, this workflow allows you to export multiple sequences from one simulation project.
 Import Scene
In the last paragraph we have seen how to create and export a specific fire sequence (e.g. fire_effect_export_1.mb). This visual effect file contains the 3D fluid container and the properties of the desired fire sequence. Since the goal of this tutorial is to create a fire effect for the fire place illustrated in Figure 1, you now should import the previously generated visual effect file into an existing scene. Therefore, please load the initial Maya scene (fire place scene) and import the visual effect file by choosing File > Import. Figure 8 shows the resulting animation created from the merged scene files.